This walk-through will get you started with the Momentum: Data Access Component Generator that is available in the Layered Architecture Solution Guidance 2013 to create data access components. Creating data access components is the second step in the LASG Code Generation guide. Before beginning this guide, please make sure that you have completed the previous tutorial on Creating Entities with Inertia in LASG.
This walk-through also uses the LeaveSample database that is part of the Layered Architecture Sample for .NET but you may use your own database to follow through.
This walk-through also uses the LeaveSample database that is part of the Layered Architecture Sample for .NET but you may use your own database to follow through.
- In Solution Explorer, expand the Tutorial solution, go to the Data folder, right-click on the Tutorial.Data project and click Add Data Access Components...
![]()
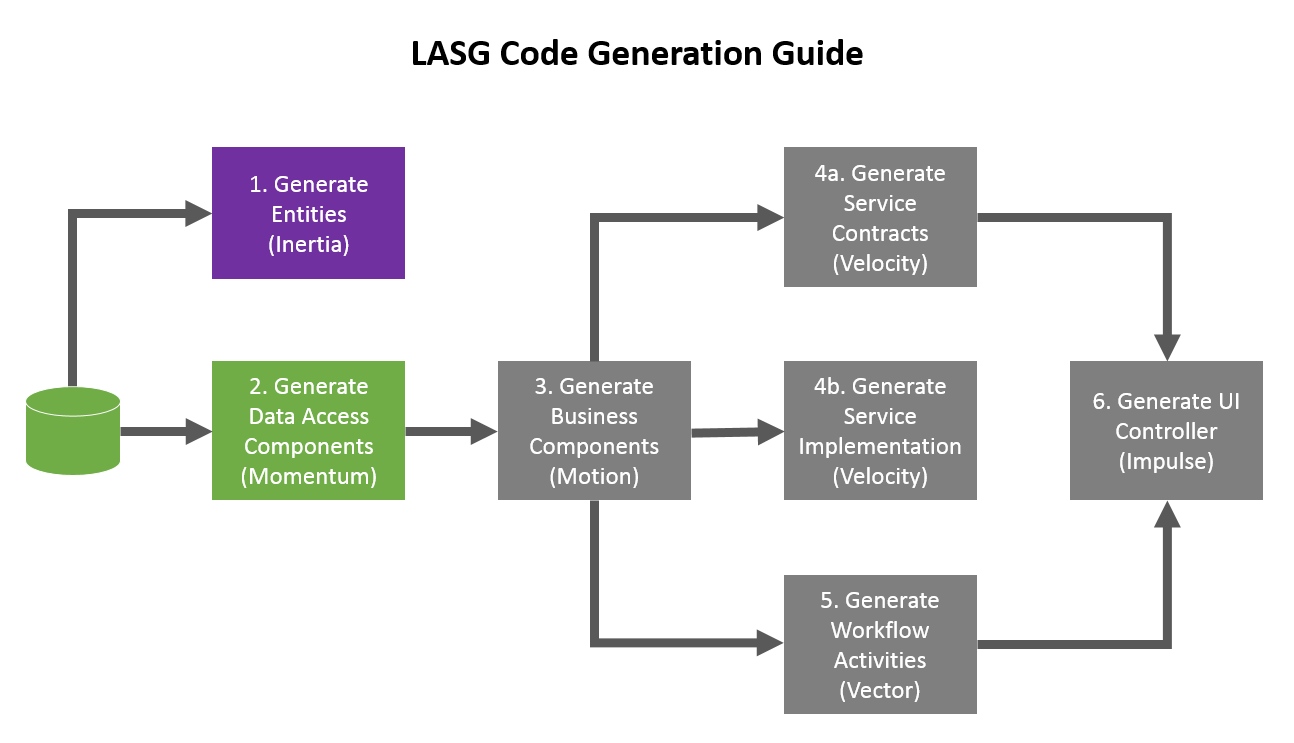
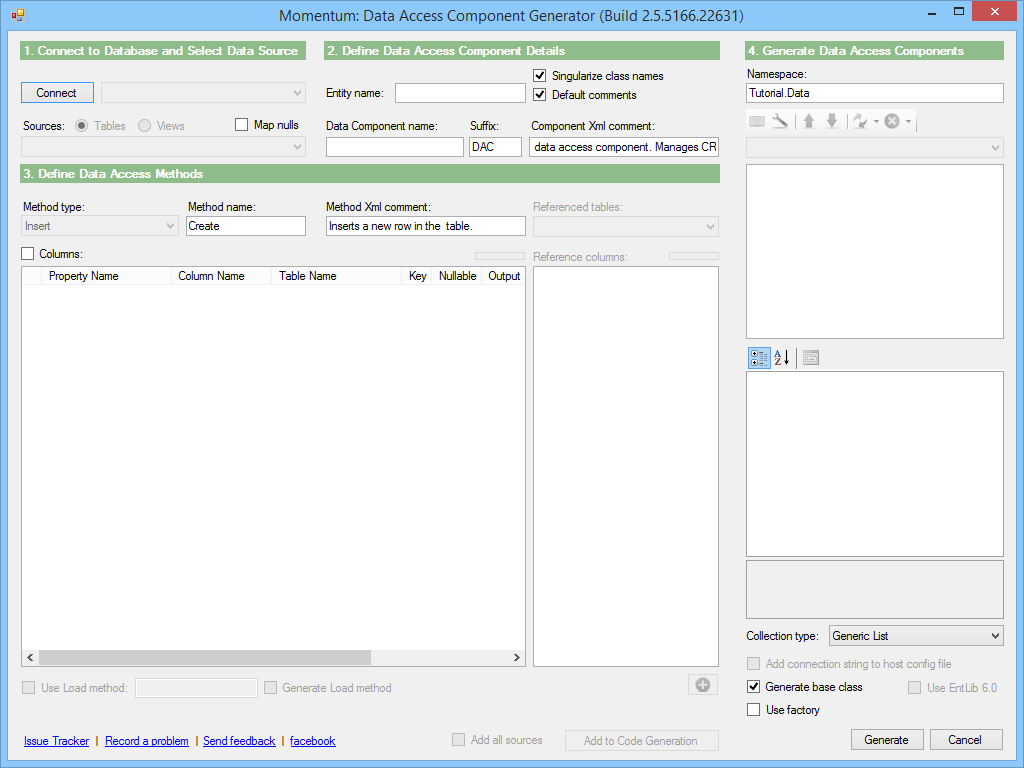
- This launches the Momentum: Data Access Component Generator. The code generator is divided into 4 sections.
![]()
Tip: Notice like all the code generators, Momentum is colour coded to the code generation guide. - At the 1. Connect to Database and Select Data Source section, click on the Connect button to connect to a Microsoft SQL Server.
- In the Connect... dialog, enter the Server name and select the appropriate authentication method. Click Connect to connect to the SQL server.
![]()
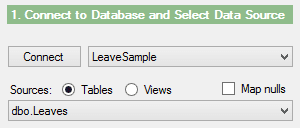
Note: LASG uses the SQL Server Management Objects and therefore, only Microsoft SQL Server is supported. You can use any editions of SQL Server including the Express edition. - Select the LeaveSample database from the database list located beside the Connect button. All the tables available in the database will be listed in the Sources dropdown list.
- Select the dbo.Leaves table from the Sources dropdown list.
![]()
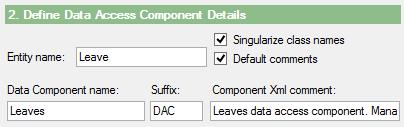
- Momentum will attempt to suggest the Entity name and Data Component name for you based on the selected table's name. By default, the components are given a "DAC" suffix. You may change that to your own naming convention (i.e. Repository) if desired.
![]()
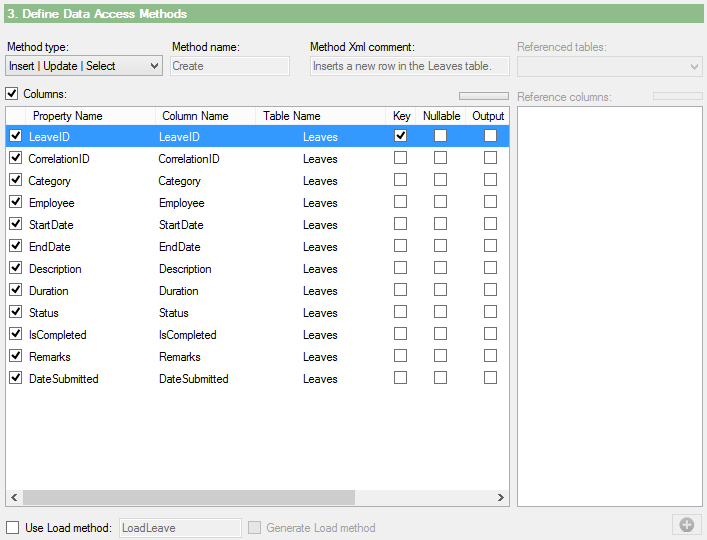
Tip: If your tables have plural names, the Singularize class names option will attempt to suggest singular entity class names for you. - At the 3. Define Data Access Methods section, you can select the Method type to create. For this tutorial, we will be creating many methods. First, select Insert | Update | Select from the Method type dropdown list.
- Click on the Columns checkbox to select all the columns.
![]()
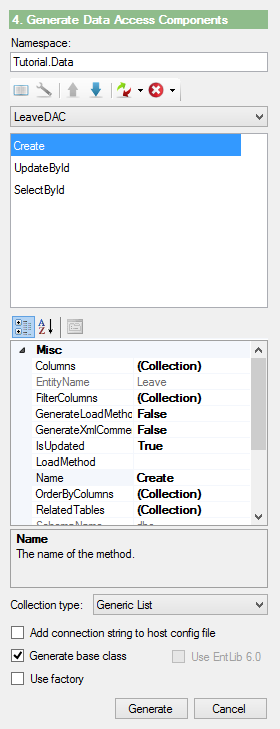
Note: If you have previously changed the name of the properties during the creation of your entity, you will also need to change them here to match it. Similar to when you are creating entities, you can click on the bar above the Columns grid to launch the Define Column Mappings dialog to fix any abbreviated column names. - Click on the Add to Code Generation button to queue the data access component definition to the 4. Generate Data Access Components section. You should see 3 methods in the list - Create, UpdateById and SelectById under the LeaveDAC. Their properties are shown in the property grid below the section. You may make any last moment changes here.
![]()
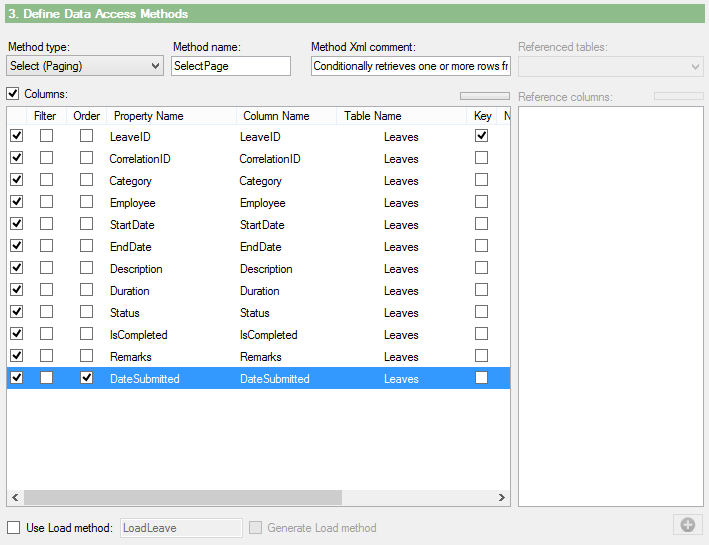
Caution! Tampering with the properties in the property grid may cause unexpected results or errors in code generation. Make sure you understand the behaviour of the code generator before messing with the values in the property grid. - Create another method. From the Method type dropdown list, choose Select (Paging). Leave the method name as SelectPage.
- You will need to specify an Order column for the SelectPage method. Click on the checkbox in the Order grid column for DateSubmitted.
![]() Tip: If you are creating many Select methods, you may want to standardize them to use one common method to load the entities. You can achieve this by checking the Use Load method checkbox and entering the method name. To generate the method, check the Generate Load method checkbox for the first Select method you create and uncheck it for subsequent methods. For this tutorial, we will leave the checkboxes unchecked.
Tip: If you are creating many Select methods, you may want to standardize them to use one common method to load the entities. You can achieve this by checking the Use Load method checkbox and entering the method name. To generate the method, check the Generate Load method checkbox for the first Select method you create and uncheck it for subsequent methods. For this tutorial, we will leave the checkboxes unchecked.
Warning! Checking these checkboxes incorrectly will cause duplicate Load methods to be generated and will result in your code not compiling. - Click the Add to Code Generation button to add the method to the LeaveDAC definition.
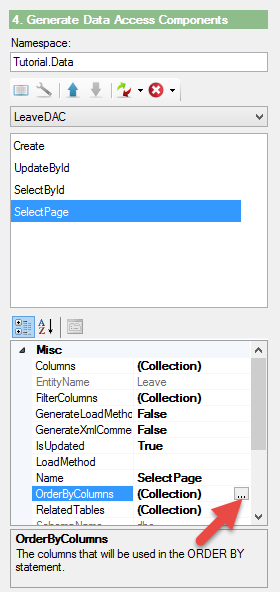
- We will need the SelectPage method to return the results ordered by descending. To do this, select the SelectPage method in the list below the LeaveDAC definition. Locate the OrderByColumns in the property grid and click on the ellipses [...] button beside it.
![]()
- At the OrderColumnModel Collection Editor dialog, make sure DateSubmitted is highlighted and locate the OrderDirection property in the property grid on the right. Change the value to Descending and click OK.
![]()
- Create another data access component for the LeaveStatusLogs table. Select dbo.LeaveStatusLogs in the Sources dropdown list.
- Choose Insert in the Method type dropdown list.
- Check the Columns checkbox to ensure all columns are selected.
- Click the Add to Code Generation button to queue the definition.
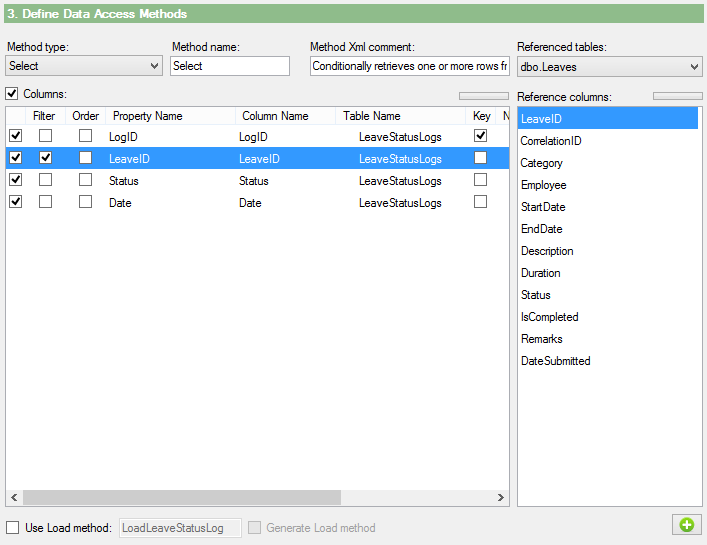
- Create a Select method for the LeaveStatusLogDAC. Choose Select in the Method type dropdown list.
- We will define a filter for this method. Check the checkbox in the Filter grid column for LeaveID.
![]() Note: Notice that the Referenced tables dropdown list is now enabled and the Reference columns list shows all the columns that belongs to the referenced table. If you have borrowed columns from other tables previously in Inertia, you will need to specify them again in here for your DAC. Momentum will automatically create a JOIN clause in the generated SQL statement for you.
Note: Notice that the Referenced tables dropdown list is now enabled and the Reference columns list shows all the columns that belongs to the referenced table. If you have borrowed columns from other tables previously in Inertia, you will need to specify them again in here for your DAC. Momentum will automatically create a JOIN clause in the generated SQL statement for you.
To add a borrowed column, select the reference column and click the [ + ] button below the Reference column list. To remove any borrowed columns, simply select it in the Columns grid and press the Delete key on the keyboard. For this exercise, we shall skip adding any borrowed columns. - At the 4. Generate Data Access Components section, you can perform various action from the tool-bar. You can Preview the code that will be generated, set Options, reposition the methods, Reset the definitions so that they will be code-generated again or Delete the definitions.Warning! Deleted definitions will not be recoverable.
![]()
Note: All definitions will be marked as code generated (indicated by the IsUpdated property) after code generation. They will continue to appear in the list but will not be code generated the next time. Clicking Reset will change one or more definitions' IsUpdated value to true and mark them for code generation again.
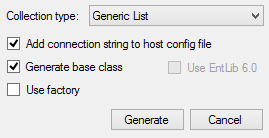
You can also Delete a method, a DAC definition or all DAC definitions from the tool-bar. Clicking on the Options icon will open the Code Generation Options dialog that will allow you to set few standard options. Leave the settings alone and click OK. - Check the Add connection string to host config file checkbox to instruct Momentum to create a connection string entry in the config file of your host project. Also make sure the Generate base class checkbox is checked for the first time you generate classes for your data access component project.
![]() Note: Momentum supports Enterprise Library DAAB 5.0 and 6.0. By default, it will generate code to use the SqlDatabase class but if you prefer to use the DatabaseFactory.Create method, you can check the Use factory checkbox. Make sure you also check the Use EntLib 6.0 checkbox if you are using Enterprise Library DAAB 6.0 when using factory.
Note: Momentum supports Enterprise Library DAAB 5.0 and 6.0. By default, it will generate code to use the SqlDatabase class but if you prefer to use the DatabaseFactory.Create method, you can check the Use factory checkbox. Make sure you also check the Use EntLib 6.0 checkbox if you are using Enterprise Library DAAB 6.0 when using factory. - Before proceeding, verify you have defined the following DAC definitions in the 4. Generate Data Access Components section:
LeaveDAC - Create, UpdateById, SelectById and SelectPage methods.
LeaveStatusLogDAC - Create and Select methods. - Finally, click the Generate button to generate the data access component classes.
- At the Code Generation Completed dialog, click OK.
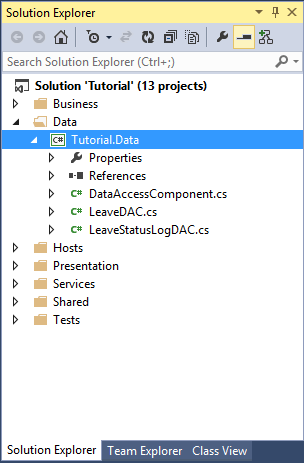
- The Tutorial.Data project should contain the generated code files for the data access components.
![]()


Summary
We have basically gone through how to use the Momentum: Data Access Component generator to create data access components for our layered application.